Easy Cast Resin River Table Ebook Download Free
This post may contain affiliate links. We may earn a small commission from purchases made through them, at no additional cost to you. You help to support resin-expert.com
If you think that you demand a professional craftsman to accept a cute epoxy tabular array, allow us exist the first to tell you that you lot don't. If you have the stomach for it, below we've laid out a few helpful tricks likewise equally a short how-to detailing exactly how y'all can create an epoxy resin table that will leave your guests request where you bought it. It might seem like quite the undertaking, but with the correct tools, the right motivation, and a few pointers, soon y'all'll exist on your way to creating an epoxy resin tabular array that would put even the most prestigious furniture store to shame.
Table of Contents
- 1 Why Are Epoxy Resin Tables So Trendy Lately?
- 2 Best Epoxy Resin for Pouring the Tabletop: INCREDIBLE SOLUTIONS Deep Pour Resin
- iii Best Tabletop Resin for Your Final Coat: Stone COAT Countertops Resin
- 4 Choosing The Correct Woods for Your Table
- v Preparing Your Wood Board
- 6 Preparing Your Workspace
- 7 Create Your Own Epoxy River Table – Step-By-Step Instructions
- 7.1 Footstep 1: Removing the Bark and Sanding the Wood
- 7.2 Footstep 2: Fill in Bumps and Cracks and Seal the Wood
- 7.3 Step 3: Build A Mold / Framework for The Tabletop
- 7.4 Stride four: Inserting the Wood into The Mold
- 7.v Pace 5: Mix Epoxy Resin
- 7.six Footstep 6: Coloring the Resin and Creating a Water Result
- seven.vii Step 7: Creating A Pattern with Crystal Articulate Resin
- 7.8 Step 8: Removing the Casting from The Mold (and Sanding)
- 7.9 Step 9: Polishing and Oiling the Tabletop
- viii Covering With Crystal Articulate Resin
- 9 Getting Polyurethane Lacquer Professionally Sprayed
- 10 Last Simply Non To the lowest degree: Adhere the Table Legs
- 11 Video Tutorial on How to Make your Own Epoxy Table
- 12 Frequently Asked Questions
- 12.one How much is Epoxy Resin for a River Table?
- 12.2 Do Epoxy River Tables final?
- 12.3 Are Epoxy Tables Heavy?
Why Are Epoxy Resin Tables So Trendy Lately?
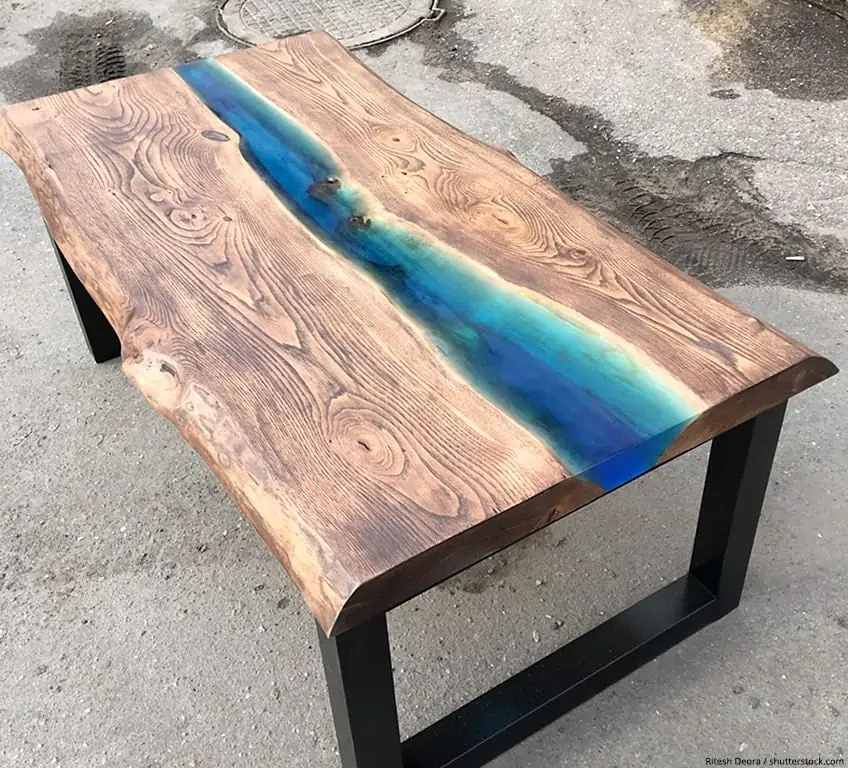
In recent months epoxy river tables have been all the rage all over the world. Although they seem to have a following all over the earth, the origin of this aesthetic movement seems to have originated in the proficient old The states. Their popularity seems the exist growing exponentially, and why wouldn't information technology? Epoxy resin tables fit nearly any aesthetic and experience at abode in any space, whether yous take a modest apartment in New York, or having a well-deserved cup of bourbon on your ranch in the light of the Texas sunset, these tables simply feelright.
How do epoxy river tables pull this off though? Well, it's a combination of factors, simply the primary reason seems to be that they have no aesthetic limit, assuasive anyone to create one that fits their style, and the space they're placing their epoxy river table in. Let'due south face it, yous know what your living space needs far better than the team over at the local IKEA does.
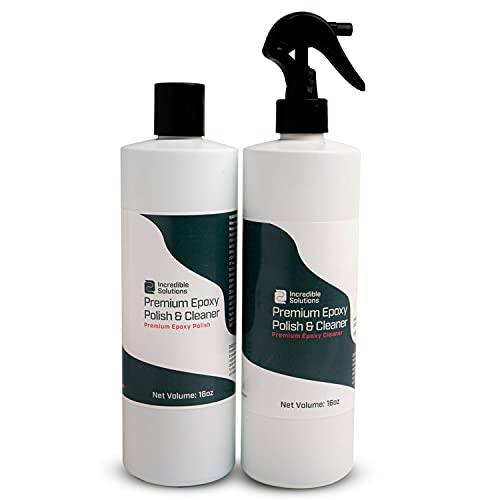
Best Epoxy Resin for Pouring the Tabletop: INCREDIBLE SOLUTIONS Deep Pour Resin
Finding the best resin for the meat of your resin tabular array production can be a existent head-scratcher. We think we've plant the perfect product for the job though, and nosotros recollect you'd do good profoundly from this amazing product. Here's a short review of its attributes and how it might benefit you lot!
If you're looking for a clear casting resin for your next tabletop projection look no further than this astonishing clear casting resin from incredible solutions. If you call up that all clear casting resins are the same you aren't lonely, but you lot should know that not all are made quite as equally as one would exist led to believe.
Why? Well, much similar any other product on the market, resins tend to be made according to a budget, and depending on what a visitor is willing to spend, you could end up with a actually expert resin or a really poor 1. Rest assured that the deep pour clear casting resin from the Incredible Solutions team is a premium one, only what makes it then great?
Well, bated from the large volume it sold in (which is simply perfect for casting resin tables) this product is incredibly consistent throughout its employ. Its premium formula ensures that bubbles and imperfections are minimal (which is ideal when pouring resin in these volumes).
What makes this resin especially impressive is how easy it is to work with compared to other products in its grade, its low viscosity formula ensures that y'all're never pressed for time and minimizes the chances of overpour. This ways that you can focus on getting each pour but right before letting it cure.
If these attributes all the same aren't enough to convince you that this is the resin for you, maybe the fact that it'southward an all-American product with a nutrient-prophylactic gradingand has a waterproof grading volition. Y'all really can't become wrong with a production similar this; as well, they have an incredible customer service team waiting to assist you with whatsoever hiccups or questions you might have regarding their production or the application you'll be using information technology for.
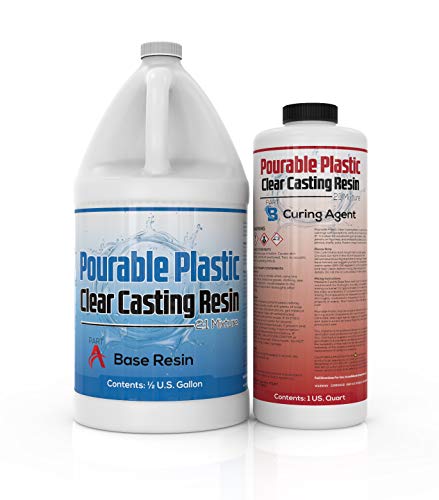
- Thick pours upwards to 2" per application, low viscosity and long working time
- Super clear results, compatible with pigments and dyes
- 2 : 1 mix ratio by volume (100 A to 44 B past weight)
View on Amazon
PROS
- Two-role formula (resin and hardener)
- It is formulated using real wood
- It is graded for varying temperatures
- It's able to fill a void well
- Information technology is a highly durable formula
CONS
- The consistency of the formula in quite thick which perturbs some users
- Expensive compared to other products in its course
- Relatively unknown brand
All-time Tabletop Resin for Your Final Glaze: Stone COAT Countertops Resin
Once you lot have the meat of your table filled up you might want to consider giving your masterpiece a final coat. They say that a workpiece is but as good as its finish, and if that is true you lot'll be doing yourself quite the disservice if you lot decide not to attempt this i out. Hither'due south what we idea.
Now that you take the meat of the matter sorted it's time for you lot to consider what your finishing touches will be. Besides sanding down the edges of your tabular array or deciding whether you'd similar to add some wood stain, yous should consider what finishing glaze you'll be adding to your existing resin filler.
A good idea is to add a finishing glaze that non only looks good but has the durability and flexibility to withstand whatever forces your table will be up against throughout its lifetime. This being said, we recollect that the Stone Coat Countertops team has washed an fantabulous job of providing the quality and quantity of production needed for this undertaking.
What makes their production so special? Well, information technology'south pretty versatile, assuasive yous to add together dyes or any other additions that might cross your heed, whether it be some Mica powder, glitter, or sequins depending on your preference.
What'southward more than, is that its oestrus resistant up to 470 degrees Fahrenheit and isn't harmful to you lot or the environment (although you should probably still habiliment personal protective gear when working with resin of absolutely any type.
Nevertheless not sold? how about the fact that this product is completely cocky-leveling and requires fiddling to no effort on your function for application, and information technology's UV resistant, significant that you tin place your table in the dandy outdoors during those summer months without having to worry about any yellowing!
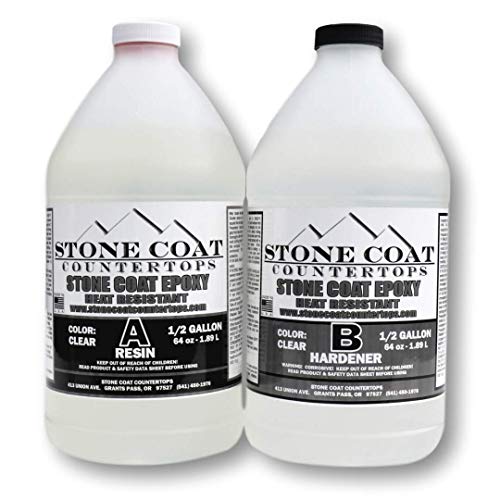
- Loftier temperature Resin - Rut Resistant upwardly to 500°F
- Crystal Clear and UV stable, null VOC
- Cured in 24 hours, cocky leveling
View on Amazon
PROS
- The two-role formula is great for finishing coats
- Sold in large volume ideal for table casting
- UV resistant formula for outdoor use
- Self-leveling formula for reduced bubbles
- Highly heat resistant and watertight
CONS
- Expensive
- Long full cure fourth dimension
- Bottle ergonomics non ideal for pouring
Choosing The Right Wood for Your Table
If the secret to baking a expert cake is choosing only the best ingredients, then the play tricks to creating the best epoxy river table is choosing the best wood. When it comes to epoxy resin tables the one aspect you don't desire to cheap out on is the quality of wood yous select for your workpiece. Why? Your table is going to run across a lot of mileage in its lifetime, and you're going to exist investing a lot of your time, money, and elbow grease in bringing it to life. The last thing you want is your hard work slowly (or quickly) falling autonomously in front end of your eyes
The wood used should exist as natural as possible. Hither, for example, a lath made from a tree trunk that is at least 4 cm thick is a practiced choice. Known commonly as "natural border" bark looks particularly stylish here. You can detect such a piece of wood in a good carpenter's workshop, at a timber dealer, or online. Alternatively, you lot can of class utilize ii wooden boards from the DIY store, which are cut into a slightly curved shape on i side using a jigsaw. Whether from a carpenter or the DIY store: the near important thing is that the woods is well stale. Ideally, the moisture content should be less than 12%.
Preparing Your Wood Board
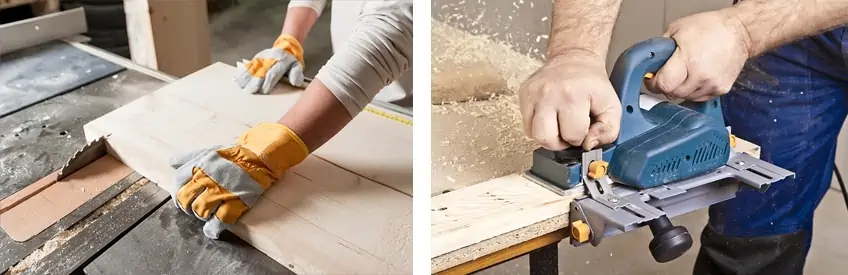
You take 2 options for the preparation of the forest. Firstly, y'all can prepare the wood itself. For this, you demand a round saw and a planer to produce the right length and thickness, and so dissever the woods down the middle.
On the other hand, yous also accept the selection of buying the boards in the desired thickness and length or simply buying some forest lath and having it cut and planned to fit your desired awarding. If you accept little feel in processing wood, this pick is far easier (don't seize with teeth off more than you lot tin can chew). Additionally, purchasing machines capable of processing wood in this way tin be quite costly, so consider your options and your budget thoroughly. Fifty-fifty if your initial piece of wood is quite big, it is advisable to have information technology prepared by a professional before you process it farther.
Before proceeding, you should make sure that your two boards are exactly the same length. Also, the side edgesmust exist cut at right angles to the straight outer sides. Keep in mind that it's besides of import that both pieces of wood take the same thickness. They should also be absolutely flat. If in incertitude, it is appropriate to commission a joiner to deport out the finishing work.
 Images: Vlad Teodor / Rawpixel.com / shutterstock.com
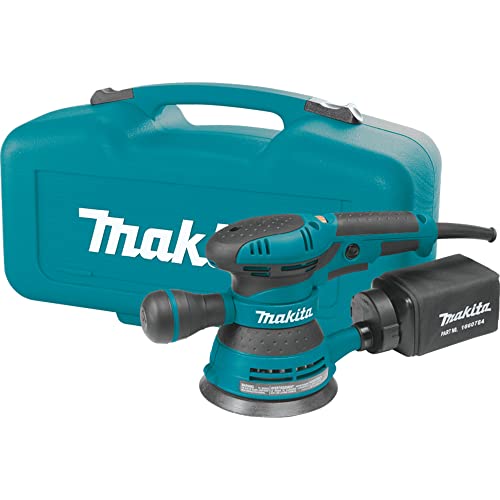
- Powerful orbital sander
- Loftier-quality motor
- Speed can be adjusted
View on Amazon
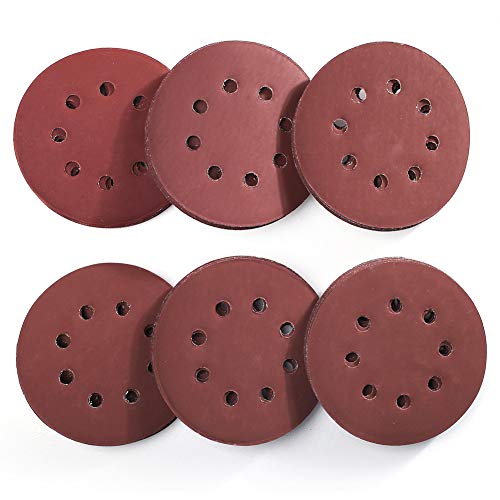
- Suitable for Makita Orbital Sanders
- 60 sanding discs included
- Grits from 1000 - 3000 for very shiny surfaces
View on Amazon
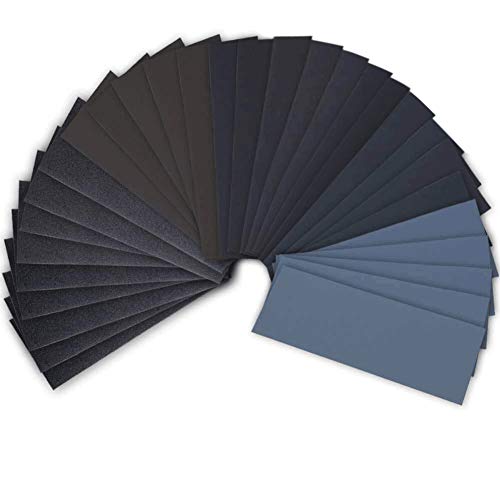
- Includes a full of 42 sheets of assorted dust sandpaper
- Made from electro-coated waterproof silicon carbide
- Suitable for moisture and dry out sanding by mitt or block
View on Amazon
Preparing Your Workspace
Since epoxy resin is quite a sensitive substance, yous should prepare your workspace appropriately earlier y'all begin casting.Very high temperatures, cold, or humidity can take a negative result on the appearance and operation of your resin. In add-on, unfavorable external atmospheric condition can affect the drying time of the resin.
The ideal temperature for processing epoxy resin is a minimum of 20° Celsius. This should also exist considered during storage, even if the room temperature is an platonic 20° C, if the temperature drops significantly towards the floor the thermometer should only show 15° to 17° C.
If the epoxy resin were to be stored on the flooring at these temperatures, tiny, unsightly bubbles could quickly form in the resin. These cannot be removed very hands even with a hot air dryer. Therefore, it is better to shop the textile on a workbench or shelf. Another of import factor is that the work area should also be a dust-free, dry, and well-ventilated setting.
Create Your Own Epoxy River Table – Footstep-By-Step Instructions
Step 1: Removing the Bawl and Sanding the Wood
- The get-go step is the thorough removal of any remaining bark, e.g. with a chisel. Although the bark looks very squeamish, it does not form an ideal bonding surface for the epoxy resin. One time the bark has been removed yous should work the edges once more past hand with sandpaper, so that wood and resin tin can later combine optimally.
- Next, sand the large surfaces of the wood smoothly. An electric sander is especially suitable for this. Yous should starting time with 80 dust and then work your style up to 220 grit. Afterwards each grit size, the grit should exist removed from the boards earlier continuing. The sides are best finished by hand with some sandpaper.
- Finally, the wood must exist cleaned extremely thoroughly, there should be literally no dust residue nowadays. A vacuum cleaner is an fantabulous tool for this, just to exist sure wipe the surface again with a microfiber cloth to get rid of the last fine sanding grit.
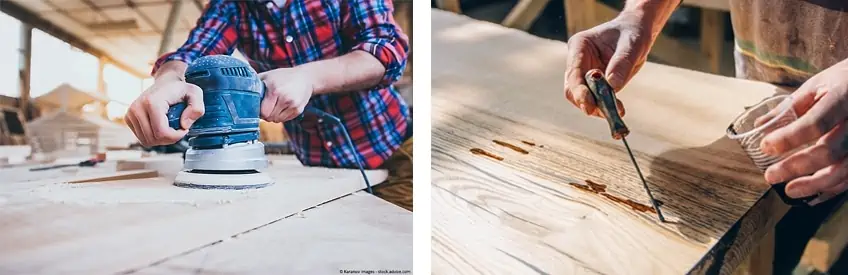 Images: left: Vlad Teodor / shutterstock.com, right: Velimir Isaevich / shutterstock.com
Step 2: Make full in Bumps and Cracks and Seal the Forest
- Now all visible unevenness, cracks, and porous surfaces on the forest must exist leveled. These are easily filled with crystal clear, unpigmented epoxy resin. If y'all want to right any unevenness in unfavorably located areas on the edges, you can seal the edges in advance with very strong adhesive tape. This volition prevent the resin from running over the edges of the wood afterward.
- After the filled-in areas have dried and the whole surface is sealed, utilize a crystal-clear resin as y'all would for filling the cracks. You should use thisvery generously over the unabridged wood surface. This sealing prevents possible outgassing from the resin layer,it is better to invest a little more money in a skillful brush that does non have weak bristles. Because once bristles take been stuck in the resin, information technology is very difficult to remove them from the resin over again. The sealant must then dry outvery well. Yous should allow 5 hours for this regardless of the blazon of resin you're using. The ideal temperature for drying is 18° to 24° C.
- Subsequently curing you should slightly roughen the inner edges that will afterwards come up into contact with the cast resin by hand with some sandpaper. This volition create the perfect base of operations for the resin to bond with the edges.
Step 3: Build A Mold / Framework for The Tabletop
- Next, a mold must be built in the desired length and size of the table. Uncomplicated MDF boards tin can exist used for this. The whole thing sounds more than complicated than information technology actually is, however, it has to be measured and worked out very precisely and advisedly. MDF boards with a thickness of sixteen mm, for both the underside and the sides, have proven to exist very suitable for the production of the mold.
- The side panels should protrude the actual tabletop past approx. 15 mm. There are two options for joining the underside with the side panels: either the individual parts tin can be screwed together or joined together withhot glue.

Images: left: brizmaker / shutterstock.com, right: Rawpixel.com / shutterstock.com
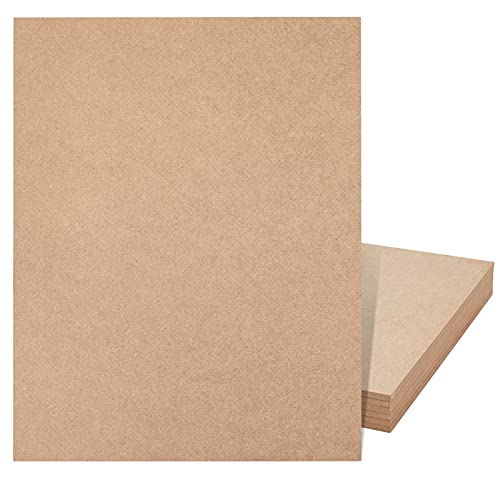
- 6 Sheets of 1/4 inch medium density fiberboard
- Tin can be painted, engraved, distressed, glued, and embellished
- Dimensions per canvass is xi x 14 inches
View on Amazon
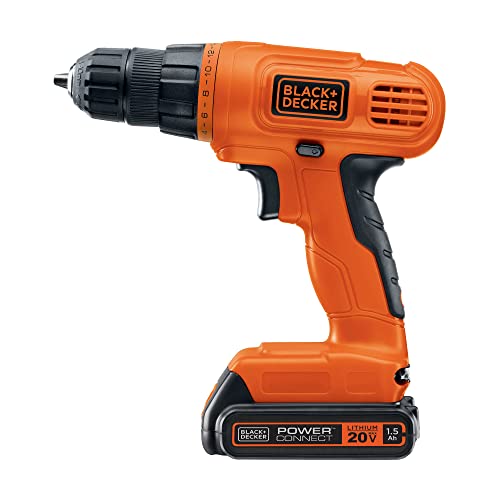
- Multiple tool interchangeable lithium ion bombardment system
- Cordless and compact with 24-position clutch to prevent stripping
- Includes battery, charger, 25 bits, iv drivers, and magnetic chip tip holder
View on Amazon
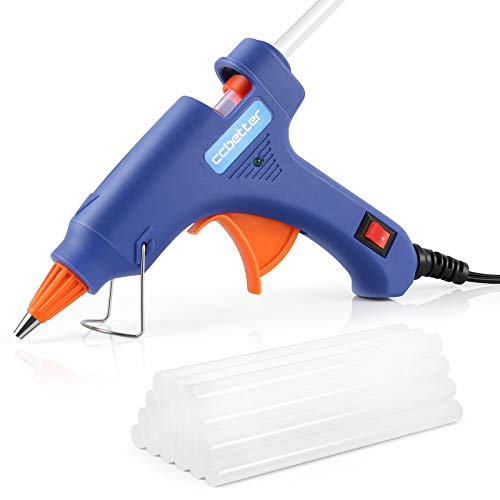
- A iii - 5 minutes fast heating glue gun
- Includes an anti-estrus comprehend and safe power switch
- Multi-purpose glue gun including 30 glue sticks
View on Amazon
- To seal the edges afterward, information technology is all-time to use articulate sanitary silicone. Here, working very carefully is essential to ensure that the mold is 100 % tight at the end. Otherwise, liquid epoxy resin will leak out.
- At present arelease agent is practical to the finished mold. This is a very of import step, equally the resin could otherwise attach to the MDF boards afterwards drying. In this case, it would be almost incommunicable to release the tabletop from the mold without dissentious it. Information technology would exist possible to use agglutinative tape to embrace the entire mold or, alternatively, liquid release wax. Spraying with Teflon spray or silicone spray (this should be applied in up to three layers until the surface is smooth) is also suitable for this purpose.
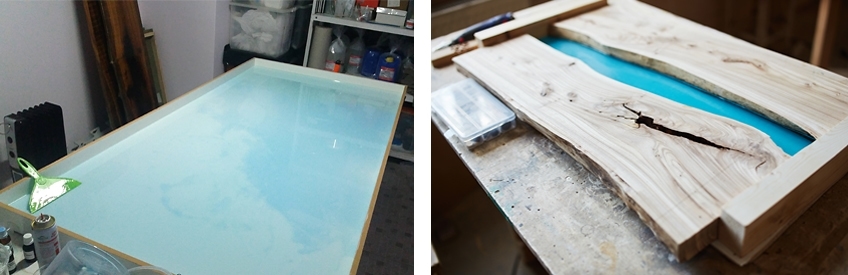 Images: left: Woods'northward Water Artwork and Design, correct: Comeback Images / shutterstock.com
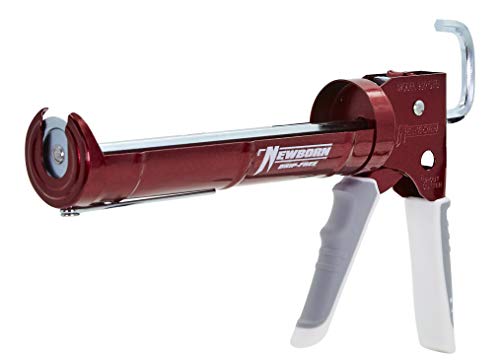
- 1/ten-gal. cartridge gun with thrust ratio of ten:1 for low viscosity materials
- Smooth pressure instead of ratchet-fashion rod requires less pressure
- Retracting rod after each trigger pull helps to forbid dripping
View on Amazon
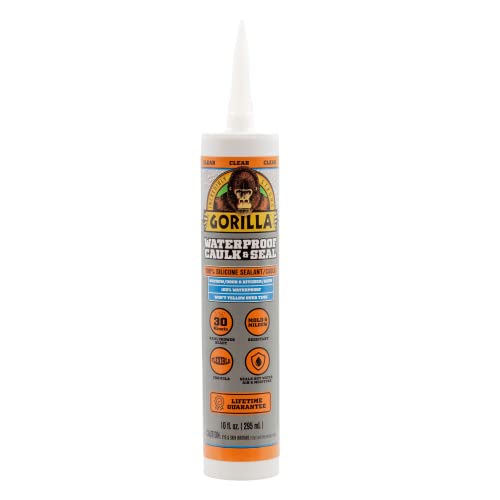
- 100% waterproof to seal out water, air, and moisture
- Set up in 30 minutes and will not yellow, compress or scissure
- Suitable for interior and all-conditions exterior use
View on Amazon

- Durable loftier bear upon ABS plastic with limited lifetime warranty
- Includes top reading feature, level plumb and 45-degree vial
- Magnetic strip for use in metalwork
View on Amazon
Stride 4: Inserting the Wood into The Mold
- Make sure that the work surface on which the mold rests is really 100% counterbalanced. If not, the resin will become skewed afterwards filling (and possibly leak). Once this has been ensured, the wood tin can and then exist placed into the mold. To do this, the wood is pushed into the position that it should have when the table is finished and and so stock-still with several parallel clamps. If y'all are planning a slightly smaller model, the wood can alternatively be fixed with heavy objects such as stones. However, you should always bear in mind that any object used to fix the woods might come into contact with the resin.
- In order to prevent the resin from after spilling over onto the unabridged table and not just in the gutter provided for it, it is appropriate to draw a kind of barrier of sanitary silicone forth the inner edges at a altitude of one to 2 cm.
Stride 5: Mix Epoxy Resin
Calculate the right amount of epoxy resin for your epoxy resin river table. This can be a trivial scrap complicated. For this reason, we have created anepoxy resin reckoner to assist you out:
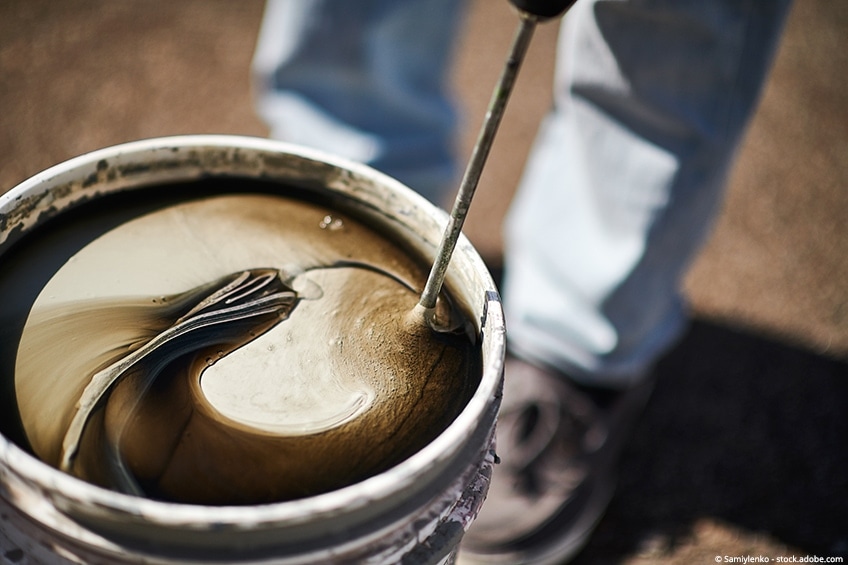
- In the next pace, you willmix the epoxy resin. Important: When working with resin delightalways wear safety glasses, breathing protection, and nitrile gloves!
- Next, you need a sufficiently large bucket. It would be ideal if this bucket holds the unabridged volume of resin or the first layer of resin. Please cull a sufficiently large bucket so that cipher goes wrong (accidents happen and resin is hard to clean upwardly). Also, the saucepan should preferably exist wider than information technology is loftier so that not too much rut is generated.
- This perfectly illustrates just how sensitive resin is as a cloth. From a certain amount and height, information technology starts to get extremely hot and in extreme cases boils and thus becomes either cloudy or straight unusable. Therefore, it may exist necessary to cast the resin in several layers. The product used is the most important factor hither. How many layers are required, or the maximum layer height and the maximum amount to be mixed ultimately depends on the thickness of your tabletop. If in doubt, detect the maximum layer of thickness specified by the manufacturer or decide directly for a special epoxy resin equally described above, which can exist bandage straight in one layer.
Images: left: Wood'n Water Artwork and Design, right: futuristman / shutterstock.com

- Powerful 8-amp motor delivers 0-2,500 rpm for heavy-duty applications
- 3/8-Inch VSR soft and comfortable pistol-grip drill with keyless chuck
- variable-speed trigger, convenient reversing switch
View on Amazon

- Fits all standard drills for mixing in i to 5 gallon buckets
- Durable, rust proof, and easy-to-make clean zinc plated steel
- Non-slippage hex head design with lifetime guarantee
View on Amazon
- Heavy-duty, corrosive-resistant bucket with thick wall construction
- Molded-in spout for easy and accurate pouring
- Holds 2.5 gallons and measures 26.03" 50 x 29.21" W x xxx.48" H
View on Amazon
- Information technology is also particularly important that the mixing ratio recommended by the manufacturer is observed and that the individual components are then thoroughly mixed. A drill with a mixer attachment has proven to be the best solution for this.
- After mixing, air bubbles that have formed in the resin can exist easily removed with a blow torch or rut gun. The dominion hither is equally much as necessary, as niggling as possible. If the resin is heated likewise much, it will exist damaged.
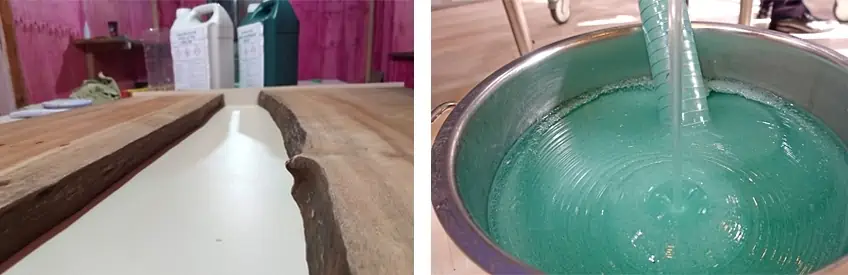
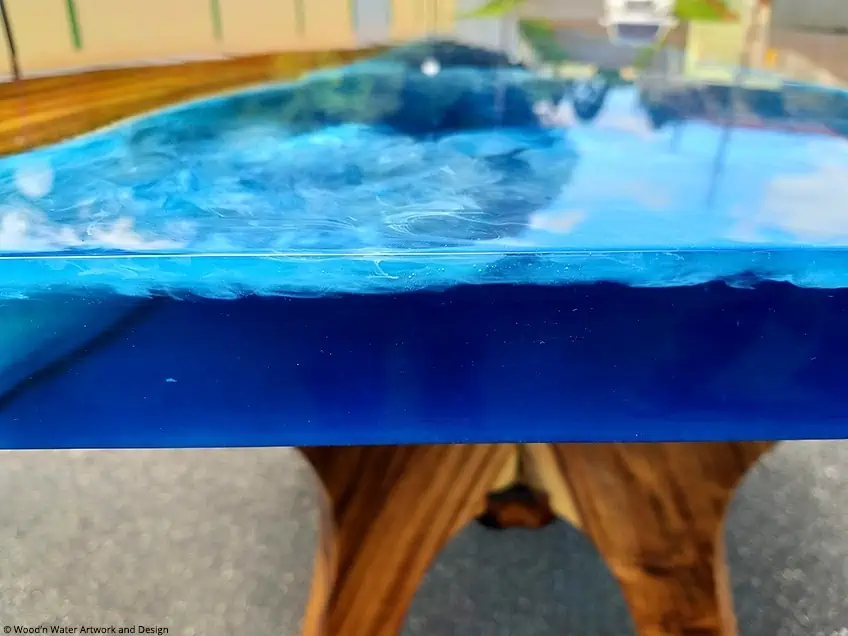
Step 6: Coloring the Resin and Creating a Water Upshot

- 24 Colors Mica Powder Set with each color 0.35oz
- Fabricated from vivid and vibrant natural ingredients and widely used in handmade crafts
- Non-toxic and Premium Quality, does non fade or oxidize
View on Amazon

- 15 Vibrant Colors, usable with all kinds of epoxy resin
- Non-toxic and odorless
- High Concentrated Resin Pigment, easy to utilise
View on Amazon
- Peculiarly when casting a water outcome, information technology chop-chop becomes clear why the use of a special epoxy resin is recommended. This quality resin can be bandage very easily in one footstep, giving yous an instant payoff.
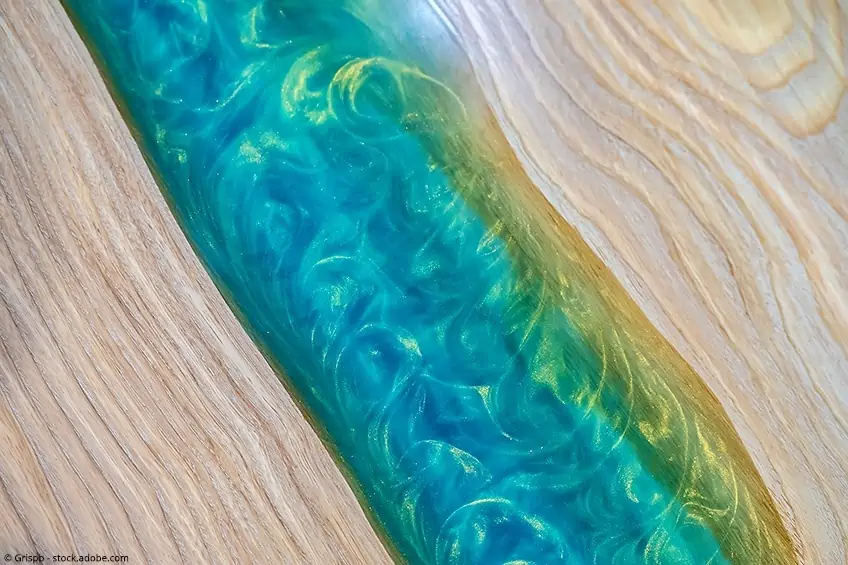
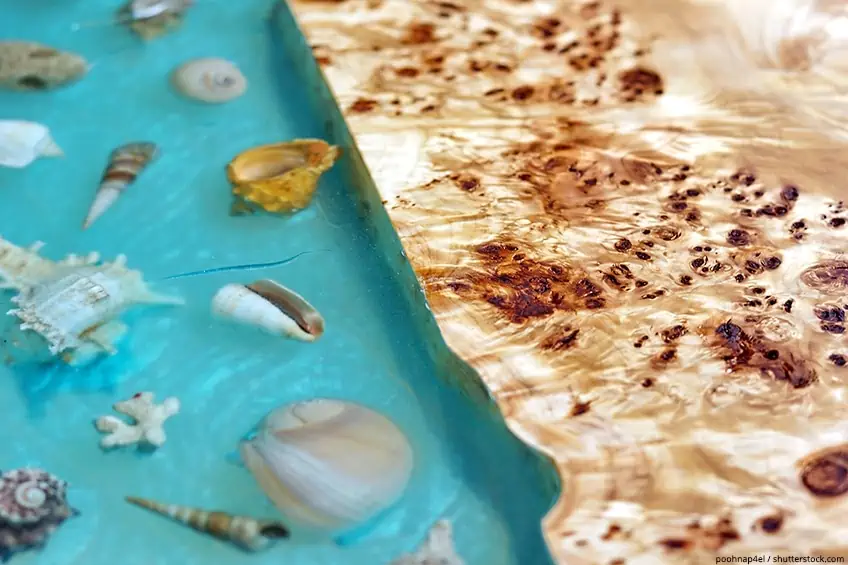
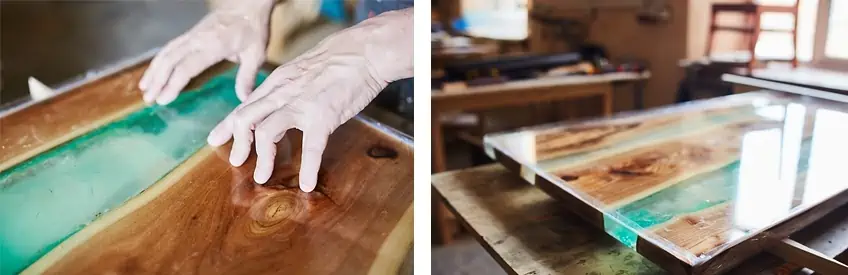
- If you desire to reach the pop water expect subsequently mixing the two resin and hardener, the appropriate color pigments must at present be added to the epoxy resin. To practise this, carve up the resin into two containers (the ratio of 1:ane.5 would be preferable, for case). To reach the h2o upshot, color the larger part of the resin with a metallic pigment in turquoise and the smaller part with a matt blue pigment. This mixture only achieves the typical water look, and generally speaking, at that place are no limits to the choice of color.
- When filling in the epoxy resin there are (again) 2 possibilities. You can either pour the resin from the two containers into the mold or simultaneously from 1 side each. Slight circular movements, especially with the metal epoxy resin, make the final result wait lively. Remember that you lot are responsible for the "flow' in the resin's appearance.
- The resulting pattern can be changed with a wooden stick or similar object.
- Afterward, the epoxy resin has to exist allowed to cure completely (follow the manufacturer's instructions).

Images: left: © Suteren Studio – stock.adobe.com, right: Suteren / shutterstock.com
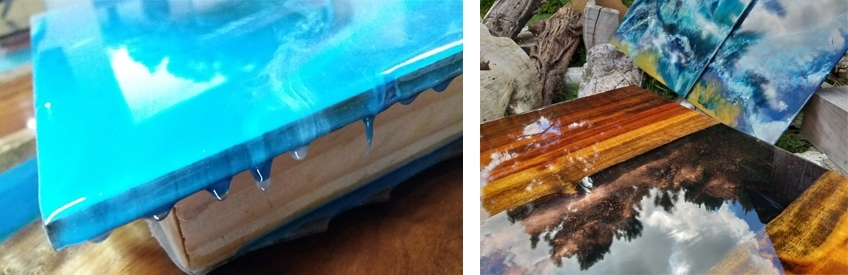
Pace 7: Creating A Design with Crystal Clear Resin
- In addition to the typical water expect, in that location is an infinite number of different designs that are capable of turning your DIY tabular array into a real piece of work of art. An aesthetic that isJust as nice to await at is a River Table with crystal clear resin and embedded objects. For this, the start layer of crystal-articulate resin is poured between the 2 wooden boards. This procedure should exist done very chop-chop, simply still with relative circumspection.
- Afterward, a quick walk over the epoxy resin with a hot air dryer is washed.Farthermost circumspection is required here. If the resin is exposed to the extreme rut of the hairdryer at the same spot for longer than 3 seconds, this tin cause, among other things, a called-for of the material. The final result is an unsightly yellow epoxy.
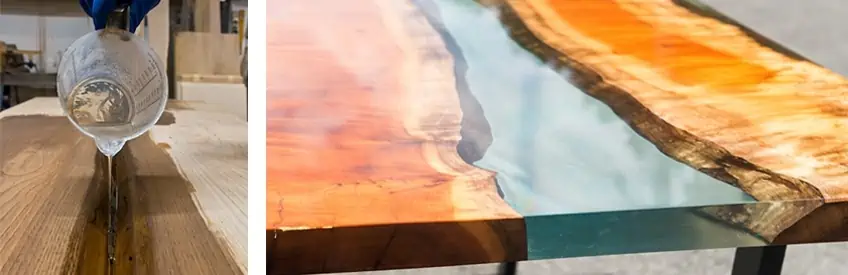
Images: left: Marco Zamperini / shutterstock.com, right: Wood'north Water Artwork and Design
- Now follows the so-chosen "B Phase", the second layer.When this layer is poured, the first layer should not all the same be completely hardened and even so slightly glutinous on the surface. You must not miss this interval, as the next layer can only bail optimally with the first one if the substrate is slightly sticky. If the first layer is already completely dry, expect until the resin is completely cured. Then sand the surface with a 220 grain, clean information technology thoroughly and then cascade the second layer.
- If you want to embed decorative elements such as crystals or pebbles in the epoxy resin, so these should be added to the 2d layer. This has the advantage that they can no longer sink to the bottom.
- Now the resin layer can exist filled in to just in a higher place the edge then allowed to dry completely again. The manufacturer's instructions should once again be observed closely.
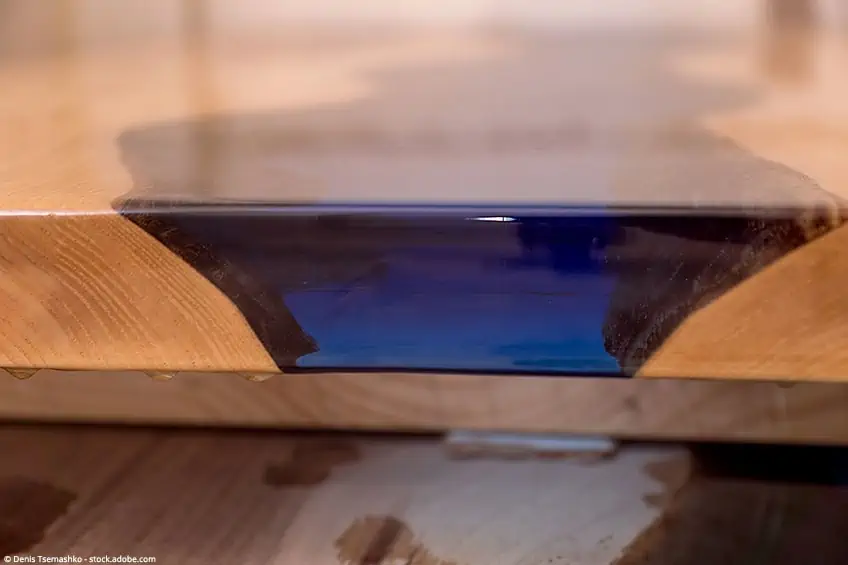
Stride 8: Removing the Casting from The Mold (and Sanding)
- Next, the cast tabletop is released from the mold. To practise this, remove all screws and parallel clamps and advisedly loosen the tabletop from the mold using a chisel and a plastic hammer.Subsequently, the tabletop can be sanded. This work can exist done by hand. However, an orbital sander makes the task much easier. Start with an 80 grit and piece of work your way upward to 400 dust and in the stop, at that place should be no more resin on the wood.
- For perfectly shine edges, these tin be additionally candy with a router before sanding or, if necessary, cleanly re-cut or aeroplane over again with a circular saw. However, these steps are not admittedly necessary. Equally a pocket-size tip: The college the grain of the sanding paper, the lighter the surface of the Epoxy River Table will be at the end.
 Images: Comeback Images / shutterstock.com
Step 9: Polishing and Oiling the Tabletop
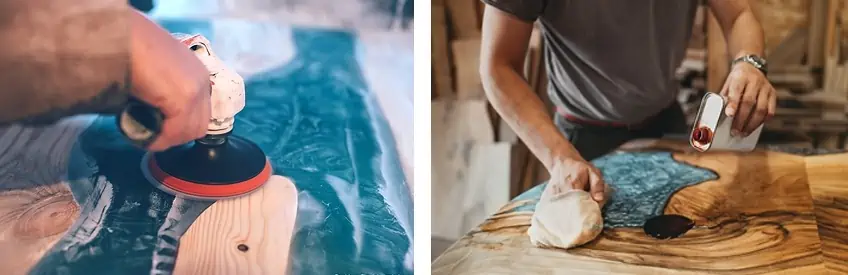
- Now for the stop in order to protect the wood optimally. On the one hand, y'all accept the possibility to achieve a natural, matt look. To achieve this, the finished tabletop – and especially the resin river – should be thoroughly polished with a polishing machine and polishing paste. This procedure ensures that all traces of sanding are removed, and a silky surface is achieved.
- For a matt appearance, oil is then applied evenly over the unabridged tabletop, e.one thousand., with a soft cloth. This method is extremely uncomplicated and seals the wood perfectly. Additionally, simply a unmarried application is required hither.
- For the epoxyresin polishing procedure, we have prepared a split up tutorial for you to savor.
 Images: left: Osadchaya Olga / shutterstock.com, right: © Suteren Studio – stock.adobe.com
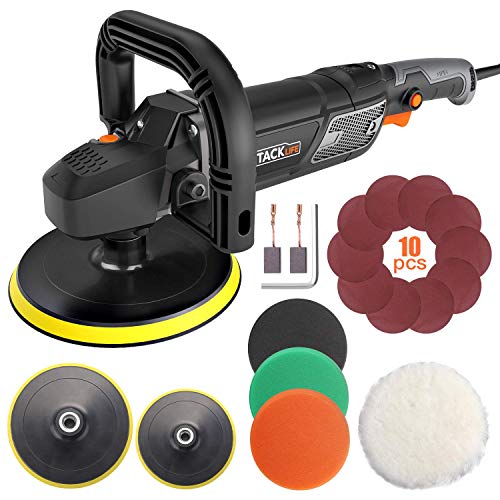
- Powerful compact orbital polishing automobile
- Digital Screen and detachable handle
- Polishing fix included, paste trays in 6 inch and 7inch, polishing pads, and carbon brush
View on Amazon
- Developed for reaching that brilliant polish on Epoxy Resin surfaces
- Removes all imperfections from the surface including scratches and scuffs
- Piece of cake removing of the polishing paste with the included cleaner
View on Amazon
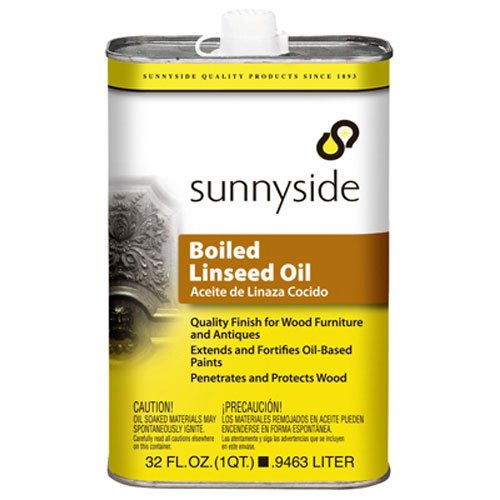
- Penetrates, protects, and eastwardnhances natural colour and grain of wood
- Use to extend and fortify oil-based paints and coatings
- Dries within 12-18 hours depending on ecology conditions
View on Amazon
Covering With Crystal Clear Resin
- If you prefer a glossy look, you lot could alternatively glaze the surface of the tabletop with crystal-articulate resin. To exercise this, showtime with the underside of the tabletop and first utilize a sturdy agglutinative tape around the top, which should protrude one to 2 cm. This prevents the resin from dripping downwards the sides.
- The resin is then poured over the surface and evenly distributed over the entire surface. A plastic spatula, for case, is suitable for this. Briefly go over the resin with a heat gun to avoid bubbling. Subsequently, the whole surface must be allowed to completely harden over again.
- Since the get-go layer is only the base, you should ever pour the second layer of resin. Here too, the first layer should be sanded briefly to ensure a successful bond between the ii layers.
- After curing, you can now remove the adhesive record on the sides. Now the edge of the painted underside is taped (at to the lowest degree 5 cm wide).
- Next, you should turn the tabletop over and put something suitable underneath it, such as leftover pieces of forest. To avoid impairment to the lacquered side, you lot could also place a fleece underneath for added cushioning.
- The tabletop must be 100% level so that the resin tin now be poured over the top of the tabular array. Afterward the subsequent distribution with a spatula and the drying time elapses, the remaining adhesive tape can now be removed, and all precipitous edges can be sanded with fine sandpaper.
Images: Forest'due north Water Artwork and Design / world wide web.woodnwater.com.br
Getting Polyurethane Lacquer Professionally Sprayed
- For a perfect, mirror-smoothen surface, a professional must exist deputed. Later all, apolyurethane blanket is particularly critical to this practice. This kind of coating can only be done with special equipment, a pigment booth, and a lot of know-how. Furthermore, this technique is very plush, but the advantage of a polyurethane coating is that you will have very loftier durability, east.g. to scratch marks. Notwithstanding, with a high-quality workpiece like the self-built Epoxy River Table, the investment in such a coating is worth considering for most crafters. After all, this is a labor of love.
Final But Non Least: Attach the Table Legs
- In club to finally finish the miracle resin table, you can screw on legs of your option. With classic wooden legs, the table looks rustic, just at the same time, slightly noble. Fashionable metallic table legs turn the table into a modern piece of piece of furniture.

- Heavy duty loftier quality steel table legs, 28.4"loftier and 25.6"wide
- Maximum load-bearing weight of each leg is well-nigh 1000lbs
- Suitable for tables and desks in a black paintable finish
View on Amazon
Video Tutorial on How to Brand your Ain Epoxy Tabular array
Ofttimes Asked Questions
How much is Epoxy Resin for a River Table?
The cost of epoxy resin you need for your river table depends on the size of the tabletop. A resin coffee table volition need yous to invest $200.00 or upwards, while a resin dining table tin cost yous up to $700.00.
Practise Epoxy River Tables last?
If properly congenital epoxy river table volition last forever if you care for information technology the right way. Don't put it exterior and nether harsh UV-light conditions, as this could cause yellowing of the resin function and cracks in the wood.
Are Epoxy Tables Heavy?
Epoxy tables are very heavy considering the epoxy resin is heavier than most woods with upward to 0.05 pounds per cubic inch. Remember that even though the dimensions of the table have remained the same, the density of the workpiece would have increased considerably, which is what causes the increase in weight.
wunderlymuseem1960.blogspot.com
Source: https://resin-expert.com/en/guide/epoxy-resin-river-table